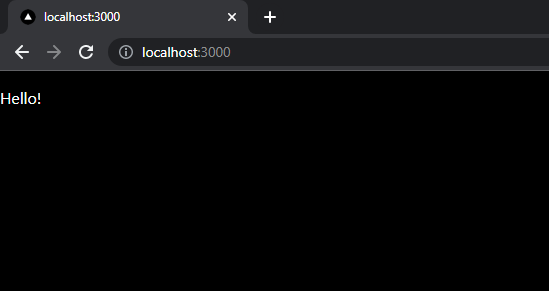
 Now that the frontend is set up, let's move on to our backend.
### Server setup
Make a directory called `server` and make a `package.json` file in the project directory with the following content:
```json
{
"name": "server",
"version": "1.0.0",
"scripts": {
"start": "node dist/index.js",
"build": "tsc --sourceMap false",
"build:watch": "tsc -w",
"start:watch": "nodemon dist/index.js",
"dev": "concurrently \"yarn build:watch\" \"yarn start:watch\" --names \"tsc,node\" -c \"blue,green\"",
"prisma-migrate": "prisma migrate dev",
"prisma-gen": "prisma generate"
}
}
```
Here, we added various scripts to help us in our development stage. We will mostly use the `dev` and the `migrate-db` scripts. They allow us to start the server in watch mode and let us migrate the database respectively. Now we can return to the workspace directory and use our `yarn server:add` to add packages. So its time to install the required dependencies using the following commands in the terminal:
```bash
yarn server:add @prisma/client argon2 axios cookie-parser cors dotenv express jsonwebtoken
```
```bash
yarn server:add -D nodemon prisma typescript concurrently @types/cookie-parser @types/cors @types/express @types/jsonwebtoken @types/node
```
After installing the dependencies we need, make a few files to have a minimal running express server:
- `server/tsconfig.json` Edit according to preferences or skip if not using typescript
```json
{
"compilerOptions": {
"target": "ES2018",
"module": "commonjs",
"lib": [
"esnext", "esnext.asynciterable"
],
"strict": true,
"skipLibCheck": true,
"sourceMap": true,
"declaration": true,
"moduleResolution": "node",
"noImplicitAny": true,
"strictNullChecks": true,
"strictFunctionTypes": true,
"noImplicitThis": true,
"noUnusedLocals": true,
"noUnusedParameters": true,
"noImplicitReturns": true,
"noFallthroughCasesInSwitch": true,
"allowSyntheticDefaultImports": true,
"esModuleInterop": true,
"emitDecoratorMetadata": true,
"experimentalDecorators": true,
"resolveJsonModule": true,
"incremental": false,
"baseUrl": "./src",
"watch": false,
"removeComments": true,
"outDir": "./dist",
"rootDir": "./src"
},
"types": ["node"],
"include": ["./src/**/*.ts"],
}
```
- `server/src/index.ts` to listen to the server.
```ts
import { CLIENT_URL, SERVER_PORT } from "./config";
import cookieParser from "cookie-parser";
import cors from "cors";
import express from "express";
const app = express();
const origin = [CLIENT_URL];
app.use(cookieParser());
app.use(cors({
origin,
credentials: true
}))
app.get("/ping", (_, res) => res.json("pong"));
app.listen(SERVER_PORT, () => console.log(`Server listening on port ${SERVER_PORT}`))
```
- `server/src/config.ts` to export some constant configuration variables
```ts
import { PrismaClient } from "@prisma/client"
export const CLIENT_URL = process.env.CLIENT_URL!
export const SERVER_PORT = process.env.SERVER_PORT!
export const prisma = new PrismaClient()
```
- `server/.env` to setup the port, client URL and database URL for the server. Make sure to ignore this file if you are working with version control
```dotenv
DATABASE_URL=postgres://postgres:postgres@localhost:5432/twitter-oauth2
CLIENT_URL=http://www.localhost:3000
SERVER_PORT=3001
```
- `server/prisma/schema.prisma` to let prisma handle the database structure
```prisma
generator client {
provider = "prisma-client-js"
}
datasource db {
provider = "postgresql"
url = env("DATABASE_URL")
}
enum UserType {
local
twitter
}
model User {
id String @id @default(uuid())
name String
username String @unique
type UserType @default(local)
}
```
Now migrate the database using the `yarn migrate-db` command, and then we can run the server using `yarn server:dev`.
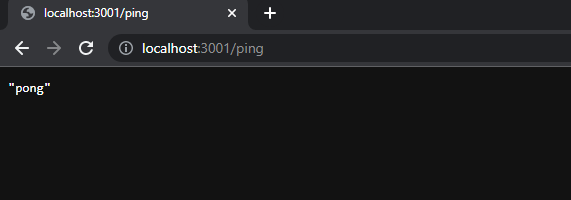
We should now be able to ping our server at http://localhost:3001/ping
Now that the frontend is set up, let's move on to our backend.
### Server setup
Make a directory called `server` and make a `package.json` file in the project directory with the following content:
```json
{
"name": "server",
"version": "1.0.0",
"scripts": {
"start": "node dist/index.js",
"build": "tsc --sourceMap false",
"build:watch": "tsc -w",
"start:watch": "nodemon dist/index.js",
"dev": "concurrently \"yarn build:watch\" \"yarn start:watch\" --names \"tsc,node\" -c \"blue,green\"",
"prisma-migrate": "prisma migrate dev",
"prisma-gen": "prisma generate"
}
}
```
Here, we added various scripts to help us in our development stage. We will mostly use the `dev` and the `migrate-db` scripts. They allow us to start the server in watch mode and let us migrate the database respectively. Now we can return to the workspace directory and use our `yarn server:add` to add packages. So its time to install the required dependencies using the following commands in the terminal:
```bash
yarn server:add @prisma/client argon2 axios cookie-parser cors dotenv express jsonwebtoken
```
```bash
yarn server:add -D nodemon prisma typescript concurrently @types/cookie-parser @types/cors @types/express @types/jsonwebtoken @types/node
```
After installing the dependencies we need, make a few files to have a minimal running express server:
- `server/tsconfig.json` Edit according to preferences or skip if not using typescript
```json
{
"compilerOptions": {
"target": "ES2018",
"module": "commonjs",
"lib": [
"esnext", "esnext.asynciterable"
],
"strict": true,
"skipLibCheck": true,
"sourceMap": true,
"declaration": true,
"moduleResolution": "node",
"noImplicitAny": true,
"strictNullChecks": true,
"strictFunctionTypes": true,
"noImplicitThis": true,
"noUnusedLocals": true,
"noUnusedParameters": true,
"noImplicitReturns": true,
"noFallthroughCasesInSwitch": true,
"allowSyntheticDefaultImports": true,
"esModuleInterop": true,
"emitDecoratorMetadata": true,
"experimentalDecorators": true,
"resolveJsonModule": true,
"incremental": false,
"baseUrl": "./src",
"watch": false,
"removeComments": true,
"outDir": "./dist",
"rootDir": "./src"
},
"types": ["node"],
"include": ["./src/**/*.ts"],
}
```
- `server/src/index.ts` to listen to the server.
```ts
import { CLIENT_URL, SERVER_PORT } from "./config";
import cookieParser from "cookie-parser";
import cors from "cors";
import express from "express";
const app = express();
const origin = [CLIENT_URL];
app.use(cookieParser());
app.use(cors({
origin,
credentials: true
}))
app.get("/ping", (_, res) => res.json("pong"));
app.listen(SERVER_PORT, () => console.log(`Server listening on port ${SERVER_PORT}`))
```
- `server/src/config.ts` to export some constant configuration variables
```ts
import { PrismaClient } from "@prisma/client"
export const CLIENT_URL = process.env.CLIENT_URL!
export const SERVER_PORT = process.env.SERVER_PORT!
export const prisma = new PrismaClient()
```
- `server/.env` to setup the port, client URL and database URL for the server. Make sure to ignore this file if you are working with version control
```dotenv
DATABASE_URL=postgres://postgres:postgres@localhost:5432/twitter-oauth2
CLIENT_URL=http://www.localhost:3000
SERVER_PORT=3001
```
- `server/prisma/schema.prisma` to let prisma handle the database structure
```prisma
generator client {
provider = "prisma-client-js"
}
datasource db {
provider = "postgresql"
url = env("DATABASE_URL")
}
enum UserType {
local
twitter
}
model User {
id String @id @default(uuid())
name String
username String @unique
type UserType @default(local)
}
```
Now migrate the database using the `yarn migrate-db` command, and then we can run the server using `yarn server:dev`.
We should now be able to ping our server at http://localhost:3001/ping
 ## Twitter OAuth2 Implementation
We are ready to implement authentication via Twitter OAuth 2.0 into our app. We will follow [this](https://developer.twitter.com/en/docs/authentication/oauth-2-0/authorization-code) approach to do so.
Firstly, we have to make an app on Twitter.
### Setup twitter user authentication settings
Head over to [twitter's developer portal](https://developer.twitter.com/en/portal/dashboard) and make a project and a development app in the project with any name. Twitter will show you the things needed. It may take a few hours to get approval from Twitter to make these apps. Once it is done, head over to the settings page of the app to set some necessary fields.
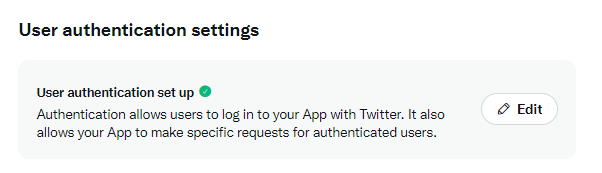
Set up or edit the user authentication as needed by your app.
## Twitter OAuth2 Implementation
We are ready to implement authentication via Twitter OAuth 2.0 into our app. We will follow [this](https://developer.twitter.com/en/docs/authentication/oauth-2-0/authorization-code) approach to do so.
Firstly, we have to make an app on Twitter.
### Setup twitter user authentication settings
Head over to [twitter's developer portal](https://developer.twitter.com/en/portal/dashboard) and make a project and a development app in the project with any name. Twitter will show you the things needed. It may take a few hours to get approval from Twitter to make these apps. Once it is done, head over to the settings page of the app to set some necessary fields.
Set up or edit the user authentication as needed by your app.
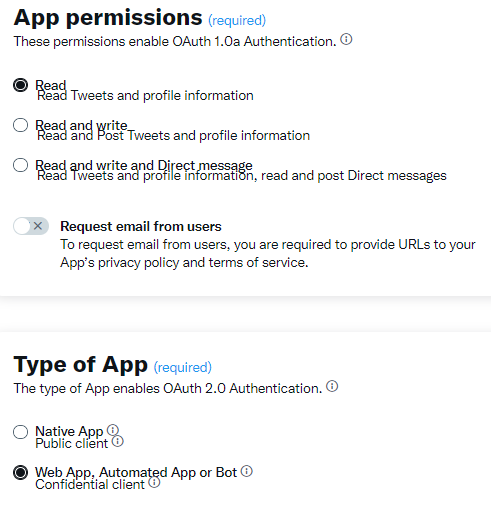
 As I only need to read profile information for this minimal web app, these are the settings I used:
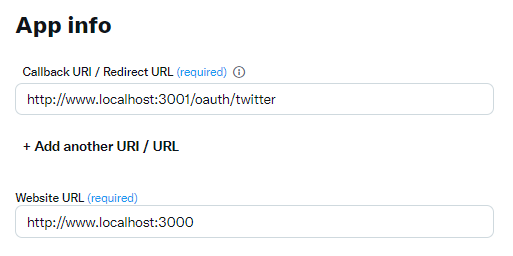 Save the Twitter Client ID and client secret securely.
> **Note**: http://www.localhost:3000 works but not http://localhost:3000.
> So, I added `www.` in both websites.
### Client
#### Frontend authentication button
Now we add the button in the client, which will lead to our backend for authentication.
To do so, we need to use a valid Twitter OAuth URL getter function and a button to go to the URL.
```ts
import twitterIcon from "../public/twitter.svg";
import Image from "next/image";
const TWITTER_CLIENT_ID = "T1dLaHdFSWVfTnEtQ2psZThTbnI6MTpjaQ" // give your twitter client id here
// twitter oauth Url constructor
function getTwitterOauthUrl() {
const rootUrl = "https://twitter.com/i/oauth2/authorize";
const options = {
redirect_uri: "http://www.localhost:3001/oauth/twitter", // client url cannot be http://localhost:3000/ or http://127.0.0.1:3000/
client_id: TWITTER_CLIENT_ID,
state: "state",
response_type: "code",
code_challenge: "y_SfRG4BmOES02uqWeIkIgLQAlTBggyf_G7uKT51ku8",
code_challenge_method: "S256",
scope: ["users.read", "tweet.read", "follows.read", "follows.write"].join(" "), // add/remove scopes as needed
};
const qs = new URLSearchParams(options).toString();
return `${rootUrl}?${qs}`;
}
// the component
export function TwitterOauthButton() {
return (
Save the Twitter Client ID and client secret securely.
> **Note**: http://www.localhost:3000 works but not http://localhost:3000.
> So, I added `www.` in both websites.
### Client
#### Frontend authentication button
Now we add the button in the client, which will lead to our backend for authentication.
To do so, we need to use a valid Twitter OAuth URL getter function and a button to go to the URL.
```ts
import twitterIcon from "../public/twitter.svg";
import Image from "next/image";
const TWITTER_CLIENT_ID = "T1dLaHdFSWVfTnEtQ2psZThTbnI6MTpjaQ" // give your twitter client id here
// twitter oauth Url constructor
function getTwitterOauthUrl() {
const rootUrl = "https://twitter.com/i/oauth2/authorize";
const options = {
redirect_uri: "http://www.localhost:3001/oauth/twitter", // client url cannot be http://localhost:3000/ or http://127.0.0.1:3000/
client_id: TWITTER_CLIENT_ID,
state: "state",
response_type: "code",
code_challenge: "y_SfRG4BmOES02uqWeIkIgLQAlTBggyf_G7uKT51ku8",
code_challenge_method: "S256",
scope: ["users.read", "tweet.read", "follows.read", "follows.write"].join(" "), // add/remove scopes as needed
};
const qs = new URLSearchParams(options).toString();
return `${rootUrl}?${qs}`;
}
// the component
export function TwitterOauthButton() {
return (
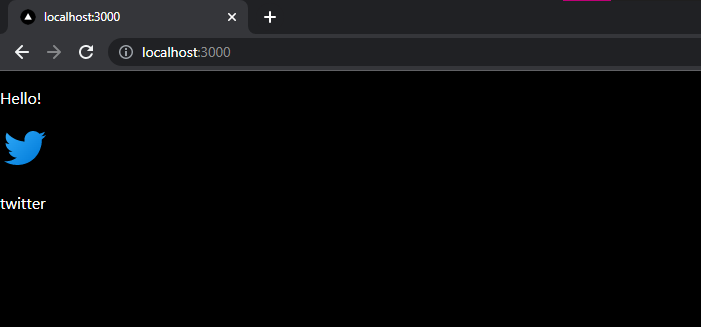 Clicking on the Twitter icon will lead us to the Twitter page where we can authorize the app:
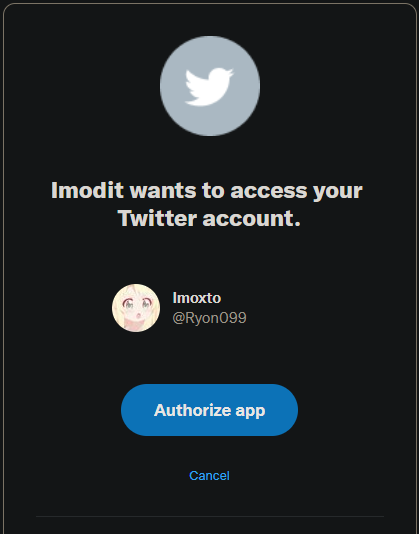 Of course, clicking on the `authorize app` button leads to a `Cannot GET /oauth/twitter` response, as we haven't implemented the backend yet.
#### Me query
Let's request for the current logged in user from the frontend through a hook, `client\hooks\useMeQuery.ts`:
```ts
import { useEffect, useState } from "react";
import axios, { AxiosResponse } from "axios";
export type User = {
id: string;
name: string;
username: string;
type: "local" | "twitter";
};
export function useMeQuery() {
const [error, setError] = useState
Of course, clicking on the `authorize app` button leads to a `Cannot GET /oauth/twitter` response, as we haven't implemented the backend yet.
#### Me query
Let's request for the current logged in user from the frontend through a hook, `client\hooks\useMeQuery.ts`:
```ts
import { useEffect, useState } from "react";
import axios, { AxiosResponse } from "axios";
export type User = {
id: string;
name: string;
username: string;
type: "local" | "twitter";
};
export function useMeQuery() {
const [error, setError] = useStateHello!
{user ? (// user present so only display user's name{user.name}
) : (// user not present so prompt to loginYou are not Logged in! Login with:
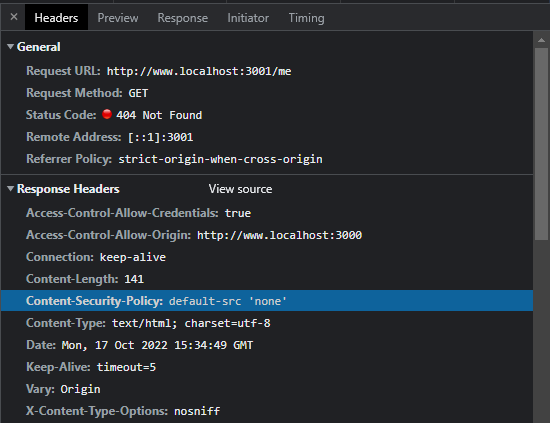 > Its 404 because we havent implemented it in the backend
#### Styling
Let's just add some basic styling while we are at it by modifying the `client\styles\globals.css` file:
```css
html,
body {
padding: 0;
margin: 0;
font-family: -apple-system, BlinkMacSystemFont, Segoe UI, Roboto, Oxygen,
Ubuntu, Cantarell, Fira Sans, Droid Sans, Helvetica Neue, sans-serif;
}
a {
color: inherit;
text-decoration: none;
}
.column-container {
display: flex;
flex-direction: column;
justify-content: center;
align-items: center;
}
.row-container {
display: flex;
flex-direction: row;
justify-content: center;
align-items: center;
}
.a-button {
border: 2px solid grey;
border-radius: 5px;
}
.a-button:hover {
background-color: #111133;
}
@media (prefers-color-scheme: dark) {
html {
color-scheme: dark;
}
body {
color: white;
background: black;
}
}
```
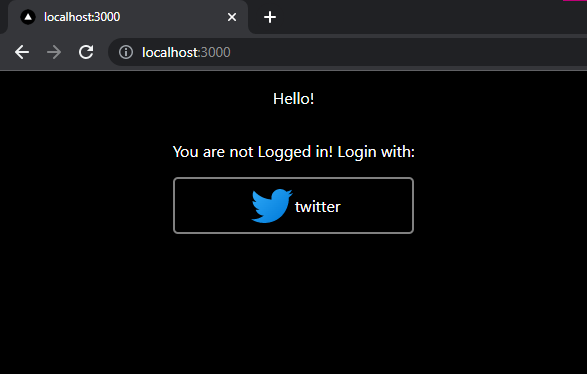
That is all we have to do on our client-side. The final homepage should look like this:
> Its 404 because we havent implemented it in the backend
#### Styling
Let's just add some basic styling while we are at it by modifying the `client\styles\globals.css` file:
```css
html,
body {
padding: 0;
margin: 0;
font-family: -apple-system, BlinkMacSystemFont, Segoe UI, Roboto, Oxygen,
Ubuntu, Cantarell, Fira Sans, Droid Sans, Helvetica Neue, sans-serif;
}
a {
color: inherit;
text-decoration: none;
}
.column-container {
display: flex;
flex-direction: column;
justify-content: center;
align-items: center;
}
.row-container {
display: flex;
flex-direction: row;
justify-content: center;
align-items: center;
}
.a-button {
border: 2px solid grey;
border-radius: 5px;
}
.a-button:hover {
background-color: #111133;
}
@media (prefers-color-scheme: dark) {
html {
color-scheme: dark;
}
body {
color: white;
background: black;
}
}
```
That is all we have to do on our client-side. The final homepage should look like this:
 ### Server
As we saw from our frontend, we need to implement `GET /oauth/twitter` route in our server to make the Twitter OAuth part of the app work. A look at the [twitter documentation](https://developer.twitter.com/en/docs/authentication/oauth-2-0/user-access-token) reveals the steps we need to perform so that we can read the info we mentioned in our scopes [here](#frontend-authentication-button).
These steps are summarized below:
1. getting the access token
2. getting the Twitter user from the access token
3. upsert the user in our database
4. create cookie so that the server can validate the user
5. redirect to the client with the cookie
> **Note**: Only the first two steps are related to Twitter OAuth Implementation
Lets add a file `server\src\oauth2.ts` where we will add our OAuth related codes. We will complete the steps above by defining a function there:
```ts
// the function which will be called when twitter redirects to the server at http://www.localhost:3001/oauth/twitter
export async function twitterOauth(req: Request
### Server
As we saw from our frontend, we need to implement `GET /oauth/twitter` route in our server to make the Twitter OAuth part of the app work. A look at the [twitter documentation](https://developer.twitter.com/en/docs/authentication/oauth-2-0/user-access-token) reveals the steps we need to perform so that we can read the info we mentioned in our scopes [here](#frontend-authentication-button).
These steps are summarized below:
1. getting the access token
2. getting the Twitter user from the access token
3. upsert the user in our database
4. create cookie so that the server can validate the user
5. redirect to the client with the cookie
> **Note**: Only the first two steps are related to Twitter OAuth Implementation
Lets add a file `server\src\oauth2.ts` where we will add our OAuth related codes. We will complete the steps above by defining a function there:
```ts
// the function which will be called when twitter redirects to the server at http://www.localhost:3001/oauth/twitter
export async function twitterOauth(req: Request We successfully got the user from Twitter now!
The most important part, i.e. getting the user from Twitter, is done. Now we can finish up our project.
## Finishing the web app
Let's finish up the rest of the steps needed for `GET /oauth/twitter` to work. Since they are not related to OAuth, I will add the functions in the `server\src\config.ts` file.
```ts
import { PrismaClient, User } from "@prisma/client"
import { CookieOptions, Response } from "express";
import { TwitterUser } from "./oauth2";
import jwt from "jsonwebtoken";
export const CLIENT_URL = process.env.CLIENT_URL!
export const SERVER_PORT = process.env.SERVER_PORT!
export const prisma = new PrismaClient()
// step 3
export function upsertUser(twitterUser: TwitterUser) {
// create a new user in our database or return an old user who already signed up earlier
return prisma.user.upsert({
create: {
username: twitterUser.username,
id: twitterUser.id,
name: twitterUser.name,
type: "twitter",
},
update: {
id: twitterUser.id,
},
where: { id: twitterUser.id},
});
}
// JWT_SECRET from our environment variable file
export const JWT_SECRET = process.env.JWT_SECRET!
// cookie name
export const COOKIE_NAME = 'oauth2_token'
// cookie setting options
const cookieOptions: CookieOptions = {
httpOnly: true,
secure: process.env.NODE_ENV === 'production'
sameSite: "strict"
}
// step 4
export function addCookieToRes(res: Response, user: User, accessToken: string) {
const { id, type } = user;
const token = jwt.sign({ // Signing the token to send to client side
id,
accessToken,
type
}, JWT_SECRET);
res.cookie(COOKIE_NAME, token, { // adding the cookie to response here
...cookieOptions,
expires: new Date(Date.now() + 7200 * 1000),
});
}
```
Import the functions and use them in the `server\src\oauth2.ts`:
```ts
import { prisma, CLIENT_URL, addResCookie } from "./config";
...
// the function which will be called when twitter redirects to the server at http://www.localhost:3001/oauth/twitter
export async function twitterOauth(req: Request
We successfully got the user from Twitter now!
The most important part, i.e. getting the user from Twitter, is done. Now we can finish up our project.
## Finishing the web app
Let's finish up the rest of the steps needed for `GET /oauth/twitter` to work. Since they are not related to OAuth, I will add the functions in the `server\src\config.ts` file.
```ts
import { PrismaClient, User } from "@prisma/client"
import { CookieOptions, Response } from "express";
import { TwitterUser } from "./oauth2";
import jwt from "jsonwebtoken";
export const CLIENT_URL = process.env.CLIENT_URL!
export const SERVER_PORT = process.env.SERVER_PORT!
export const prisma = new PrismaClient()
// step 3
export function upsertUser(twitterUser: TwitterUser) {
// create a new user in our database or return an old user who already signed up earlier
return prisma.user.upsert({
create: {
username: twitterUser.username,
id: twitterUser.id,
name: twitterUser.name,
type: "twitter",
},
update: {
id: twitterUser.id,
},
where: { id: twitterUser.id},
});
}
// JWT_SECRET from our environment variable file
export const JWT_SECRET = process.env.JWT_SECRET!
// cookie name
export const COOKIE_NAME = 'oauth2_token'
// cookie setting options
const cookieOptions: CookieOptions = {
httpOnly: true,
secure: process.env.NODE_ENV === 'production'
sameSite: "strict"
}
// step 4
export function addCookieToRes(res: Response, user: User, accessToken: string) {
const { id, type } = user;
const token = jwt.sign({ // Signing the token to send to client side
id,
accessToken,
type
}, JWT_SECRET);
res.cookie(COOKIE_NAME, token, { // adding the cookie to response here
...cookieOptions,
expires: new Date(Date.now() + 7200 * 1000),
});
}
```
Import the functions and use them in the `server\src\oauth2.ts`:
```ts
import { prisma, CLIENT_URL, addResCookie } from "./config";
...
// the function which will be called when twitter redirects to the server at http://www.localhost:3001/oauth/twitter
export async function twitterOauth(req: Request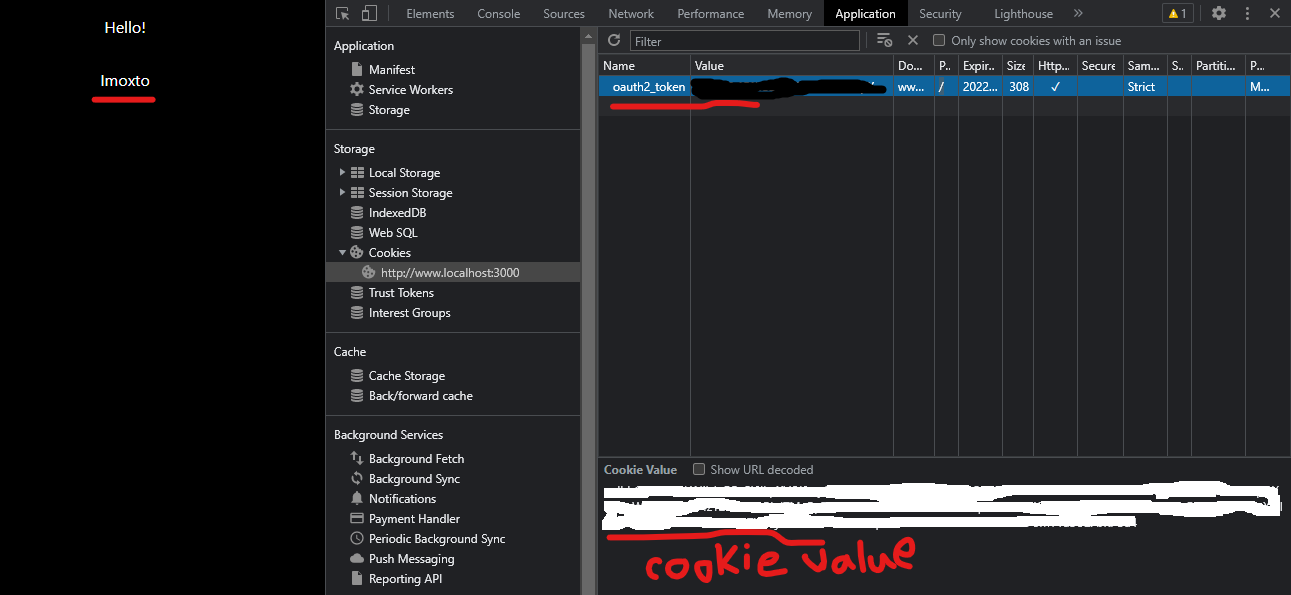 We see our Twitter username in there instead of the Twitter button now, which shows that the `me` query is being executed successfully. As a result, we now have a working user authentication system, via Twitter OAuth 2.0, in our minimal full-stack web application.
## Conclusion
Thanks for reading! [This](https://github.com/Reinforz/twitter-oauth2-blog) is the Github repository with all the codes. Find more fun things you can do with the Twitter API [here](https://developer.twitter.com/en/docs/api-reference-index). Another example implementation of authentication via Twitter OAuth 2.0 can be found [here](https://github.com/imoxto/imodit).
*Written by [Rafid Hamid](https://github.com/imoxto)*
We see our Twitter username in there instead of the Twitter button now, which shows that the `me` query is being executed successfully. As a result, we now have a working user authentication system, via Twitter OAuth 2.0, in our minimal full-stack web application.
## Conclusion
Thanks for reading! [This](https://github.com/Reinforz/twitter-oauth2-blog) is the Github repository with all the codes. Find more fun things you can do with the Twitter API [here](https://developer.twitter.com/en/docs/api-reference-index). Another example implementation of authentication via Twitter OAuth 2.0 can be found [here](https://github.com/imoxto/imodit).
*Written by [Rafid Hamid](https://github.com/imoxto)*